 ultimate-guide
Exterior Painting Prep Checklist 2026
Table of Contents
- Exterior Painting Prep Checklist: Your Complete Guide
- Inspect the Exterior and Assess the Scope of Work
- How to Prepare a House for Exterior Painting
- Exterior Painting Prep Tools You'll Need
- Weather, Moisture, and Material-Specific Preparation
- How Long Does Exterior Paint Preparation Take?
- What to Do Before Exterior Painters Arrive
- Common Mistakes to Avoid During Exterior Paint Prep
- Frequently Asked Questions
Last Updated: October 17, 2026
Exterior Painting Prep Checklist: Your Complete Guide
Proper exterior painting preparation determines whether your paint job lasts five years or fifteen. At SunPro Contracting LLC, preparation quality separates a paint job that holds up from one that fails.
This guide covers the complete exterior painting prep checklist for 2026, from inspection through final site preparation.
Inspect the Exterior and Assess the Scope of Work
Before you touch a brush or pressure washer, walk your property systematically and document what needs attention, this determines your timeline, budget, and repair priorities.
Walk the perimeter systematically
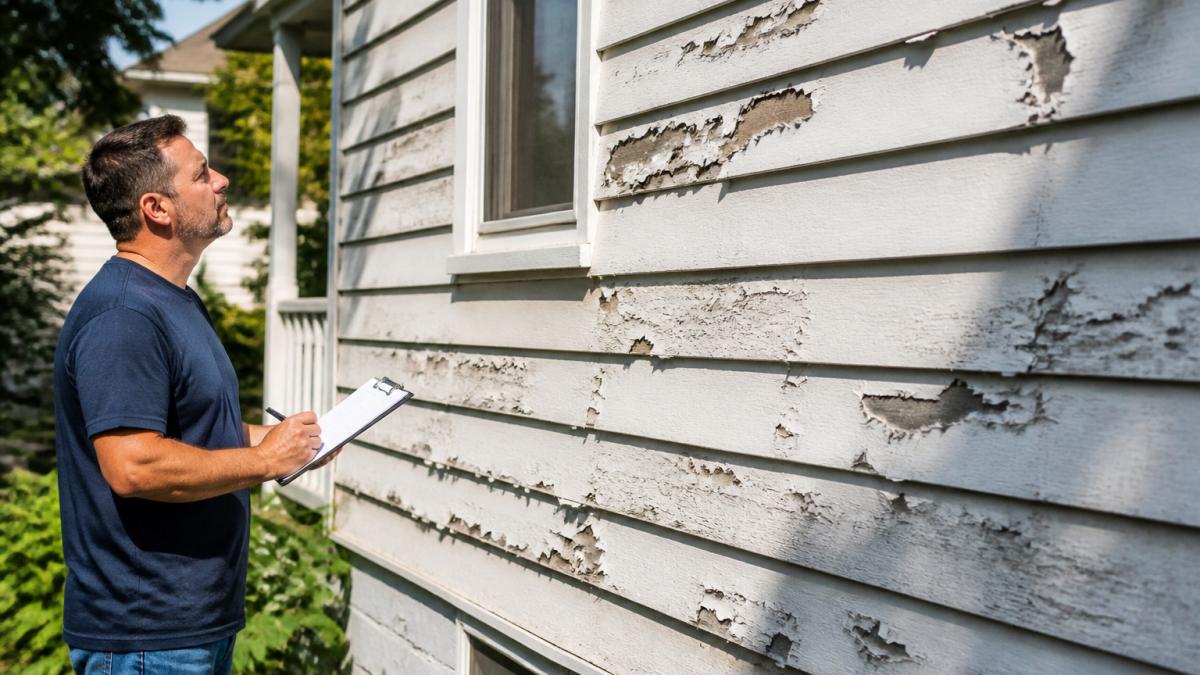
Start at one corner and move around the perimeter, checking siding, trim, doors, windows, soffits, and fascia. Photograph problem areas for reference.
Note weather exposure: south and west-facing walls get more UV damage, north-facing areas hold moisture longer, and areas near downspouts often show water damage or mold.
Document damage and repair needs
List what you find: peeling paint, cracks, rotted wood, missing caulk, rust, mold, and gaps. This inventory becomes your repair checklist, rotted wood must be replaced, loose paint scraped, and gaps caulked, while surface mold can wait for cleaning.
How to Prepare a House for Exterior Painting
Once you've assessed the scope, preparation follows a logical sequence: clean, repair, and prime. Skipping any step compromises the final paint job.
Clean and wash all exterior surfaces
A clean surface is essential for paint adhesion, dirt, mold, mildew, and chalky residue prevent bonding.
For wood siding and trim, use moderate pressure (1,500-2,000 PSI) to avoid driving water into the wood; for brick or concrete, 2,500-3,000 PSI works well.
For surfaces too delicate for pressure washing, hand-wash with a stiff brush and appropriate cleaner; mold and mildew often need a specialized product.
Remove loose and peeling paint
Loose paint must be removed before new paint goes on, failing paint will continue to fail underneath new coats.
Scrape until you reach solid paint or bare substrate, smoothing the transition edge to prevent ridges that show through new paint. Wear a dust mask, especially on pre-1978 homes where lead-based paint was common.
Repair damaged siding, trim, and caulk gaps
Replace rotted wood with material matching the existing trim profile. Fill small gaps with paintable caulk in a continuous bead, and smooth with a wet finger or caulk tool before it dries.
Use flexible exterior caulk for minor siding cracks and wood filler for larger damage on bare wood; sand smooth once dry. All repairs must be completely dry before painting.
Exterior Painting Prep Tools You'll Need
Most prep failures trace back to the wrong tool for the substrate. Match the tool to the surface, then verify the result before moving on.
Cleaning tools by surface
- Pressure washer (2,500-3,000 PSI, 2.5-3 GPM): For brick, concrete, and stucco. Use a 25- or 40-degree nozzle and keep the tip moving; a 0-degree tip will etch masonry and drive water behind siding.
- Pressure washer (1,500-2,000 PSI) or garden hose and stiff brush: For wood and fiber cement. Fiber cement is stable but can be damaged by a concentrated stream at the seams.
- Soft wash setup (pump sprayer plus downstream injector): For vinyl, painted wood, and any surface with mildew. A sodium hypochlorite solution (typically 1-2% in the mix) kills mildew at the root; scrubbing alone removes the stain but leaves spores.
Paint removal and surface prep tools
- Carbide-tipped paint scraper (2-3 inch): The go-to for trim and detail work. A sharp carbide edge outlasts a steel blade and produces a cleaner transition between loose and sound paint.
- Random-orbit sander with 80- then 120-grit paper: For feathering edges on bare wood and smoothing filler. Do not use a belt sander on siding, it removes too much material too fast and leaves gouges that telegraph through new paint.
- Heat gun (1,000-1,500°F) or chemical stripper: For lead-safe removal on pre-1978 homes. Heat guns set below 1,100°F avoid vaporizing lead, but wet scraping and chemical strippers are the safer default when lead is suspected.
Repair and sealing tools
- Caulk gun with a smooth-rod tip: A smooth-rod (not a cutter) tip produces a consistent bead. Use a paintable exterior sealant rated for the substrate, siliconized acrylic for wood and trim, polyurethane for masonry and metal joints.
- Putty knife (1.5-3 inch) and two-part epoxy wood filler: Epoxy filler is the right choice for rotted wood that will be painted; standard wood filler shrinks and cracks when exposed to weather.
- Moisture meter (pin or pinless): The single most underused prep tool. A reading below roughly 15% on wood indicates the surface is dry enough to prime; above that, wait.
Access and safety equipment
- Fiberglass extension ladder with a 4:1 base ratio: Set the base one foot out for every four feet of working height, and secure the top with a ladder stabilizer. Never work above the top three rungs.
- Fall-protection harness and roof anchors: Required by OSHA for work at height above the trigger threshold (generally 6 feet in construction). If you are not trained on anchor systems, call a professional.
- Pressure-washer GFCI protection: Plug the washer into a GFCI-protected outlet and keep the cord out of standing water. Water and electricity are the most common serious injury pairing on exterior prep jobs.
Quality-control check before you move on
Before you put the tools away, confirm each surface is clean, sound, dry, and properly primed: clean means no chalk or mildew residue on a white cloth; sound means no loose paint when you press a fingernail into the edge; dry means a moisture-meter reading in the acceptable range; primed means bare and repaired areas are coated and cured per the label.
Weather, Moisture, and Material-Specific Preparation
Environmental conditions dramatically affect both prep work and paint application. Understanding these thresholds prevents costly mistakes.
Temperature and humidity thresholds
Most exterior paints perform best between 50°F and 85°F, below that, paint doesn't cure properly; above it, paint dries too quickly.
High humidity (above 85%) traps moisture under the paint film, causing adhesion failure and premature peeling. Early morning application often works better because humidity drops as the day warms.
Surface moisture and drying time
Painting over damp surfaces causes paint failure. After pressure washing or rain, allow at least 48 hours of dry weather before painting, longer in humid climates, and use a moisture meter on wood to verify dryness.
Bare wood dries slower than previously painted surfaces, and shaded areas dry slower than sun-exposed ones, plan your prep timeline accordingly.
Lead-paint and hazardous-material precautions
Homes built before 1978 likely contain lead-based paint, and lead dust is a serious health hazard, particularly for children and pregnant women (the EPA).
According to EPA guidance on lead-safe renovation practices, work areas should be contained to prevent dust spread.
When in doubt, have paint tested by a certified lab, the cost is minimal compared to the health risks of improper lead removal.
How Long Does Exterior Paint Preparation Take?
Prep time depends on the scope you documented, the material mix on your house, and your weather window. The ranges below assume a single-story home of roughly 1,500-2,500 square feet of painted surface; scale up for larger homes.
Baseline prep timeline by phase
| Phase | Typical duration | What drives the range |
|---|---|---|
| Inspection and documentation | 2-4 hours | Number of elevations, accessibility, whether you use a moisture meter |
| Washing and mildew treatment | 4-8 hours | Surface area, amount of mildew, whether soft washing is needed |
| Drying after wash | 24-48 hours minimum | Humidity, shade, material (bare wood dries slowest) |
| Scraping and paint removal | 1-5 days | Extent of peeling; lead-safe protocols add 30-50% to this phase |
| Repairs (rot, siding, caulk) | 1-3 days | Number of rotted sections, cure time for filler and caulk |
| Priming and primer cure | 1-2 days | Bare-area square footage, primer recoat window |
| Final quality check | 2-4 hours | Whether you catch failures before paint |
A home in good condition with minimal peeling can be prepped in 3-5 working days. A home with significant peeling, rot, and lead-safe requirements can run 2-3 weeks of working time, plus weather delays.
Weather and moisture go/no-go criteria
This is where projects actually slip. Use these thresholds as decision gates rather than guesses:
- Washing: Air temperature above 40°F and no rain forecast for 24 hours. Below 40°F, cleaning solutions stop working and water can freeze in siding seams.
- Scraping and sanding: Dry conditions; avoid wind above roughly 15 mph because dust containment fails.
- Caulking: 40-80°F with no rain for 24 hours. Most exterior sealants will not cure below 40°F and skin over poorly above 90°F.
How inspection findings change the schedule
Use your inspection notes to build the schedule rather than applying a generic estimate:
- Cosmetic only (chalk, mildew, minor caulk gaps): 3-5 working days.
- Moderate (peeling on one or two elevations, a few rotted trim sections): 1-2 weeks.
- Heavy (widespread peeling, rot at corners and sill plates, pre-1978 home): 2-3 weeks, and lead-safe containment adds setup and teardown time to every workday.
Quality gates that protect the timeline
Build a hold point into the schedule before paint application. Do not let the painter start until you can confirm, surface by surface, that it is clean, sound, dry, and primed. If a gate fails, the schedule slips by a day, far cheaper than a recoat or peel-and-redo within two years.
Plan for 2-4 weeks of calendar time on a typical exterior repaint, but treat the working-day estimate as a floor, not a promise. Weather gates and quality hold points are what actually determine whether the prep is done in time to paint, or done in time to last.
What to Do Before Exterior Painters Arrive
If you're hiring professional painters, preparation on your part ensures smooth project execution.
Final site walkthrough and quality checks
One day before painters arrive, do a final walkthrough: verify loose paint is removed, repairs are fully cured, surfaces are clean and dry, and no new damage has appeared.
Photograph the current condition, this documentation protects both you and the contractor if damage appears during painting.
Protect landscaping and nearby property
Trim vegetation away from the house, move potted plants, lawn furniture, and outdoor equipment clear of the work area, and cover sensitive plants with plastic sheeting if overspray is possible.
Inform neighbors if work will be loud or disruptive, since pressure washing and scraping create noise and equipment may need parking nearby.
Common Mistakes to Avoid During Exterior Paint Prep
Rushing the cleaning phase is mistake number one, dirt and mold under new paint cause adhesion failure.
Ignoring weather costs money, painting in rain or high humidity prevents proper curing, and paint peels within months.
Not addressing lead-paint hazards puts your family at risk.
Proper exterior painting preparation takes time and attention to detail, but it's the foundation for paint that lasts.
If you want the preparation done right, our team handles everything from initial inspection through final surface preparation.
Frequently Asked Questions
What should be included in an exterior painting prep checklist?
A complete exterior painting prep checklist covers surface inspection for damage, cleaning and power-washing, scraping loose paint, repairing siding and trim, caulking gaps, trimming vegetation, protecting landscaping, checking moisture levels, and verifying surface readiness. Each step ensures the paint adheres properly and lasts longer. Missing even one step can lead to peeling paint or premature failure, which is why professional painters prioritize thorough preparation.
How do you prepare a house exterior for painting?
Start with a detailed walkthrough to identify all damage and repairs needed. Pressure-wash or hand-wash all surfaces to remove dirt and mildew. Scrape or sand off loose and peeling paint down to bare wood or solid paint. Repair any damaged siding, trim, or caulk gaps around windows and doors. Trim vegetation away from the house. Protect landscaping and nearby property with drop cloths or plastic sheeting. Allow surfaces to dry completely before priming and painting. This sequence ensures a clean, stable foundation for paint adhesion.
How long does exterior paint preparation take?
Preparation time varies by house size and damage extent. A small single-story home with minimal repairs may take 2-4 days, while a two-story home with significant damage can require 5-10 days or more. Washing, scraping, and repairs are the most time-intensive phases. Drying time between steps, especially after power-washing, adds 1-2 days depending on humidity and temperature. Budget extra time in spring or fall when humidity is higher; surfaces dry slower in cool, damp conditions.
What tools are needed to prepare a house for exterior painting?
Essential prep tools include a pressure washer or garden hose with brush, paint scraper or putty knife, wire brush, sandpaper or sanding block, caulk gun and exterior caulk, pry bar, drop cloths or plastic sheeting, safety glasses, work gloves, and a ladder or scaffolding for reaching high areas. A moisture meter helps verify that surfaces are dry enough to paint. Having the right tools prevents shortcuts and ensures thorough, professional-quality preparation.
Do you need to wash the exterior before painting?
Yes, washing is essential. Dirt, mildew, algae, and chalky paint residue prevent new paint from adhering properly. Power-washing or hand-scrubbing removes these contaminants and helps the primer and paint bond securely to the surface. Failure to clean can result in peeling, blistering, or early paint failure. Allow 48-72 hours for surfaces to dry completely after washing before applying primer.
What should homeowners do before professional painters arrive?
Complete all prep work: inspect, clean, scrape, repair, and caulk surfaces. Trim vegetation away from the house. Protect landscaping, AC units, and fixtures with drop cloths or plastic. Ensure surfaces are dry and ready for primer. Clear the work area of obstacles. If you've hired professionals, confirm they've performed a pre-paint walkthrough and provided an itemized estimate. Ask about their warranty and timeline. This preparation prevents delays and ensures the painters can start immediately.
How dry does a house exterior need to be before painting?
Exterior surfaces must be completely dry, typically 48-72 hours after power-washing or heavy rain, depending on humidity and temperature. Use a moisture meter to verify; surfaces should read below 12-15% moisture content. In humid conditions, allow extra drying time. Painting over damp surfaces causes primer and paint to fail, leading to peeling, blistering, and mildew growth. Spring and fall prep requires longer drying windows than summer due to lower temperatures and higher humidity.
Should you scrape or sand peeling exterior paint?
Both methods work, depending on the situation. Scraping removes loose, peeling, or flaking paint quickly and is best for large areas of failure. Sanding smooths rough edges and feathers the transition between old and new paint, creating a better finish. For most homes, start with scraping to remove failed paint, then sand the edges to blend them. Remove all loose paint down to bare wood or solid paint; any remaining loose paint will fail again within months.