 how-to
How to Prevent Exterior Paint Peeling: A Complete Guide
Table of Contents
- Why Is Exterior Paint Peeling: Identifying the Root Causes
- Exterior Paint Preparation: The Foundation for Durability
- How to Fix Peeling Exterior Paint: Step-by-Step Repair
- Exterior Paint Drying Time Between Coats: Getting It Right
- Weather Conditions and Application Windows
- Maintenance and Prevention Schedule
- Frequently Asked Questions
Last Updated: October 7, 2026
Why Is Exterior Paint Peeling: Identifying the Root Causes
Exterior paint peeling happens when paint loses adhesion to the surface beneath it. Understanding why this occurs is the first step to prevent exterior paint peeling and protecting your home's exterior.
The main culprits behind paint failure fall into four categories: moisture problems, poor prep work, incompatible materials, and weather stress. Each creates a different peeling pattern. Learning to read those patterns saves you time and money.
Moisture and Water Infiltration
Water is the number one enemy of exterior paint. When moisture gets trapped between the paint and the surface, adhesion fails. The paint bubbles, cracks, and eventually peels away in sheets.
Moisture infiltration happens in several ways:
- Rain or snow seeping through gaps, cracks, or damaged siding
- Condensation building up behind the paint film
- Ground water wicking up through the foundation or lower walls
- Poor drainage around gutters or downspouts directing water toward the house
The telltale sign: paint peels in large sections, often blistering first. You'll see the paint bubble outward before it flakes off. This pattern screams moisture problem.
Poor Surface Preparation
This is where most paint jobs fail before the brush ever touches the surface. Skipping proper prep work is like building a house on sand. The paint has nothing to grip.
Common prep mistakes include:
- Painting over loose, flaking, or chalky old paint
- Skipping the cleaning step, leaving dirt, mildew, or salt residue
- Failing to sand rough areas smooth
- Not allowing enough drying time between cleaning and painting
- Ignoring cracks, gaps, or damaged wood
Paint needs a clean, dry, stable surface. Without it, adhesion suffers from day one.
Incompatible Paint or Primer
Not all paints work together. Applying latex paint over oil-based primer, or vice versa, creates a slippery interface where adhesion breaks down. The two coatings have different expansion rates and chemical compatibility.
Similarly, using a primer not designed for exterior use or choosing paint formulated for interior conditions sets you up for failure. Exterior paint must handle UV exposure, temperature swings, and moisture.
Temperature and Weather Stress
Paint cures and expands differently depending on conditions. Extreme temperature swings stress the paint film. Cold nights followed by hot days cause the material to contract and expand repeatedly, eventually cracking and peeling.
Painting in the wrong conditions accelerates failure:
- Applying paint when temperatures are below 50°F or above 85°F
- Painting in direct sunlight, which causes uneven drying
- High humidity preventing proper curing
- Rain within 24-48 hours of application washing away wet paint
Exterior Paint Preparation: The Foundation for Durability
Proper surface preparation determines whether your paint job lasts five years or fifteen. This step takes time, but it is non-negotiable. At SunPro Contracting LLC, we prioritize prep work because it's where most paint failures originate.
Inspect and Assess the Painted Surface
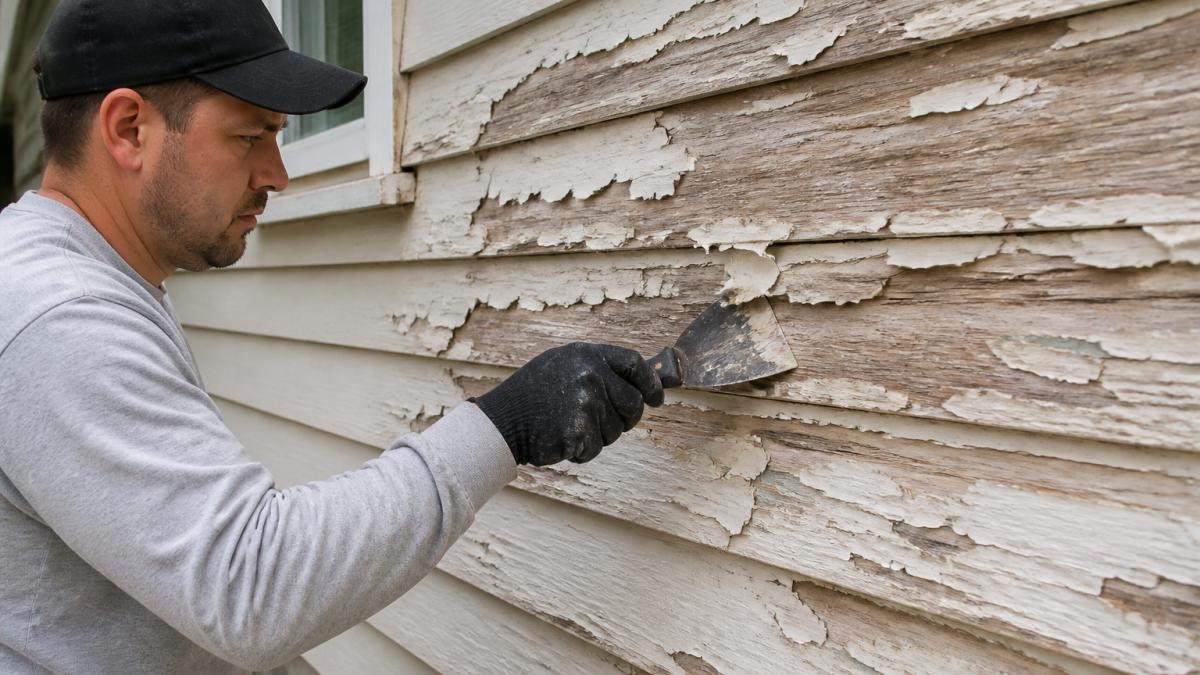
Before you pick up a scraper, understand what you're working with. Walk the entire exterior in daylight. Look for patterns in the peeling. Does it concentrate near the foundation, around windows, or in shaded areas?
Check for:
- Active water stains or moisture marks
- Soft or spongy wood indicating rot
- Cracks wider than 1/8 inch
- Areas where paint is peeling in large sheets versus small flakes
- Chalky residue when you rub the paint with your hand
Document what you find. If you see active moisture or wood damage, address those issues first. Painting over rot or active water infiltration wastes money and time.
Scrape and Remove Loose Paint
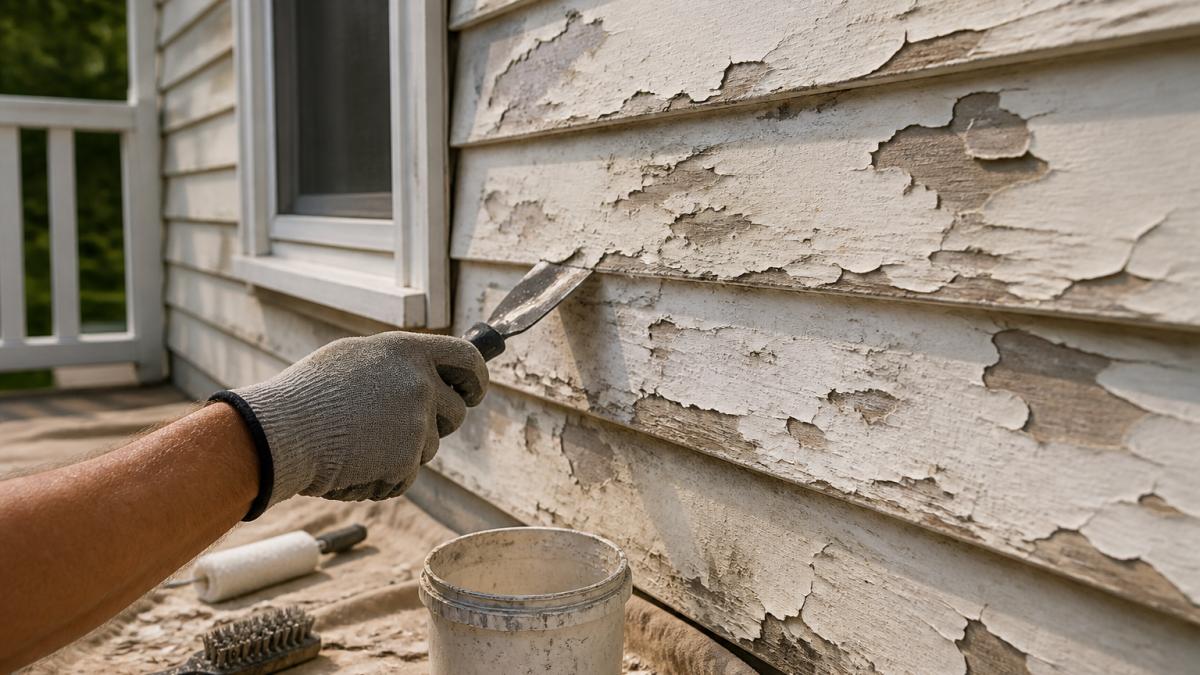
Loose paint must go. All of it. Use a paint scraper or putty knife to remove any paint that doesn't adhere firmly to the surface. Work systematically, scraping in one direction.
How to scrape effectively:
- Use a stiff-bladed scraper (not a flexible putty knife)
- Angle the blade at 30-45 degrees to avoid gouging the wood
- Work from top to bottom to avoid re-coating scraped areas with debris
- Scrape until you hit solid paint or bare wood
- Dispose of paint chips properly, especially if the home was built before 1978 (likely contains lead) (the EPA)
Scraping is tedious. Do not skip it. Paint will not adhere to loose paint.
Sand Rough and Peeling Areas
After scraping, sand the edges where old paint meets bare wood. This feathers the transition and creates a smooth surface for new paint to grip.
Sanding guidelines:
- Use 80-120 grit sandpaper for rough areas
- Use 150-180 grit for final smoothing before priming
- Sand in the direction of the wood grain
- Create a smooth transition at paint edges (feather out, not a sharp line)
- Vacuum or wipe away all dust before priming
Proper sanding prevents the new paint from sitting on a shelf of old paint. It bonds to a stable, smooth substrate.
Clean and Dry the Surface
A clean surface is a primed surface. Dirt, mildew, salt, and chalky residue block adhesion. Clean everything.
Cleaning steps:
- Use a stiff brush to remove loose debris
- Wash with a garden hose or pressure washer (use low pressure to avoid damaging the surface)
- For mildew or algae, use a 1:3 bleach-to-water solution and scrub
- For salt residue (common near coastal areas), rinse thoroughly
- Allow the surface to dry completely (24-48 hours in dry weather)
Never prime or paint a damp surface. Moisture prevents adhesion and traps water behind the paint film.
How to Fix Peeling Exterior Paint: Step-by-Step Repair
Once you understand why the paint peeled, fixing it becomes straightforward. The process addresses the root cause while preparing for a durable repaint.
Address Moisture Sources First
If moisture caused the peeling, fix the moisture problem before repainting. Otherwise, the new paint will fail too.
Common moisture fixes:
- Repair or replace damaged siding, trim, or flashing
- Clear gutters and downspouts; extend downspouts at least 4-6 feet from the foundation
- Caulk gaps around windows, doors, and trim
- Ensure grading slopes away from the foundation
- Install or repair vapor barriers in crawl spaces or basements
Moisture investigation requires patience. Walk the perimeter after rain. Look for water stains, soft spots, or areas where water pools. These are your clues.
Repair Gaps, Cracks, and Damaged Siding
Small gaps and cracks allow water penetration. Seal them before painting.
Repair approach:
- Use exterior caulk for gaps up to 1/4 inch wide (acrylic latex caulk works for most situations)
- For larger gaps or missing siding, replace the damaged section or use exterior filler
- For cracks in wood, fill with exterior wood filler, sand smooth, and prime
- Allow caulk and filler to cure fully before priming (follow product instructions, typically 24-48 hours)
Caulk is cheap insurance against future water infiltration.
Prime Bare Wood and Repaired Areas
Bare wood must be primed. This is non-negotiable. Primer seals the wood, prevents tannin bleed-through (dark stains), and provides a surface for paint adhesion.
Priming rules:
- Use a high-quality exterior primer rated for bare wood
- Apply primer to all scraped areas and bare wood
- Primer should be compatible with your finish paint (ask the paint supplier to confirm)
- Allow primer to dry fully before painting (typically 2-4 hours, but check the label)
- Prime even small spots; skipping primer on small areas causes uneven paint coverage and potential future peeling
Do not skip primer to save time or money. Primer costs less than repainting a failed job.
Apply Compatible Paint
The final coat is where aesthetics and durability meet. Choose exterior paint formulated for your climate and surface type.
Paint selection:
- Use 100% acrylic latex exterior paint (not interior paint, not oil-based unless the primer is oil-based)
- Match the primer chemistry; if you used latex primer, use latex paint
- Choose paint rated for your climate (high humidity, UV exposure, temperature extremes)
- Apply thin, even coats rather than one thick coat
- Allow proper drying time between coats (typically 2-4 hours, but check the label)
Quality paint costs more upfront but lasts longer and resists peeling better than budget options.
Exterior Paint Drying Time Between Coats: Getting It Right
Patience pays off here. Rushing drying times is a common mistake that undermines the entire job.
Drying time depends on:
- Temperature (warmer speeds drying; cold slows it dramatically)
- Humidity (high humidity extends drying time significantly)
- Paint type (latex dries faster than oil-based)
- Surface porosity (porous surfaces dry faster)
- Coat thickness (thicker coats take longer)
Most exterior latex paints dry to the touch in 2-4 hours. However, drying to the touch does not mean ready for the next coat.
Check the label. Do not guess. Applying a second coat before the first is fully cured traps moisture and causes peeling or cracking.
Weather Conditions and Application Windows
Paint is sensitive to weather. Apply it in the wrong conditions and you've wasted time and money.
Ideal conditions:
- Temperature between 50°F and 85°F (ideally 60-75°F)
- Humidity below 85%
- No rain in the forecast for at least 48 hours after application
- Avoid direct sunlight during application (paint in shade or wait for overcast conditions)
- Avoid painting in early morning when dew is present or late evening when temperatures drop
Check the weather forecast before you start. If rain is coming, postpone. If temperatures are dropping toward 50°F at night, wait for warmer weather. A few days' delay is far better than a failed paint job.
Maintenance and Prevention Schedule
Exterior paint does not last forever. Regular maintenance extends its life and catches problems early.
Annual maintenance:
- Inspect the painted surface in spring and fall
- Look for new peeling, chalking, or cracks
- Clean gutters and downspouts to prevent water backup
- Check caulking around windows and doors; re-caulk if gaps appear
- Remove mildew or algae with a soft brush and mild detergent
Every 3-5 years:
- Wash the entire exterior to remove dirt, salt, and mildew
- Touch up small areas of peeling or fading
- Re-caulk gaps that have opened
Repainting:
- Plan to repaint every 7-10 years, depending on climate and sun exposure
- In high-UV areas or harsh climates, repaint every 5-7 years
- Address any peeling immediately; do not wait for the next scheduled paint job
Prevention is cheaper than repair. A small maintenance effort today prevents major peeling problems later.
To prevent exterior paint peeling, you must understand the root causes and address them systematically. Contact SunPro Contracting LLC today for a consultation on exterior painting solutions tailored to your home's specific needs.
Frequently Asked Questions
Why does my exterior paint keep peeling?
Exterior paint peels most often due to moisture trapped behind the paint film, poor surface preparation before painting, or incompatible primer and paint combinations. Water infiltration from gaps, cracks, or failed caulking allows moisture to build up and break the paint's adhesion. Temperature fluctuations and humidity also stress the paint layer. Identifying which cause applies to your home, whether it's a moisture source, old flaking paint that wasn't fully removed, or weather exposure, is the first step to stopping it.
How should I prepare exterior surfaces to prevent paint from peeling?
Start by scraping off all loose and peeling paint down to a solid edge. Sand rough areas smooth, then clean the entire surface with a pressure washer or stiff brush to remove dirt, mildew, and contaminants. Let the surface dry completely, typically 24-48 hours depending on humidity. Fill gaps, cracks, and holes with appropriate filler or caulk. Prime any bare wood or repaired areas with a high-quality primer compatible with your topcoat. Proper surface preparation removes the conditions that cause paint to fail and ensures the new paint bonds firmly.
How long should exterior paint dry between coats?
Drying time depends on the paint type, temperature, humidity, and sunlight. Most quality exterior paints require 4-8 hours between coats in ideal conditions (70°F, low humidity, good ventilation). In cooler or more humid weather, drying can take 12-24 hours or longer. Always check the manufacturer's label for specific guidance. Applying a second coat too soon traps moisture and weakens adhesion, leading to peeling. Patience between coats is essential for a durable finish.
Can you paint over peeling exterior paint?
No, painting over peeling paint will fail quickly. The new paint cannot bond to loose or flaking layers, so it will peel in the same spots within months. You must remove all loose paint by scraping and sanding, clean the surface thoroughly, and let it dry completely before priming and repainting. Skipping this step is the most common reason homeowners see peeling return. Proper prep work takes time but is the only way to achieve a lasting exterior paint job.