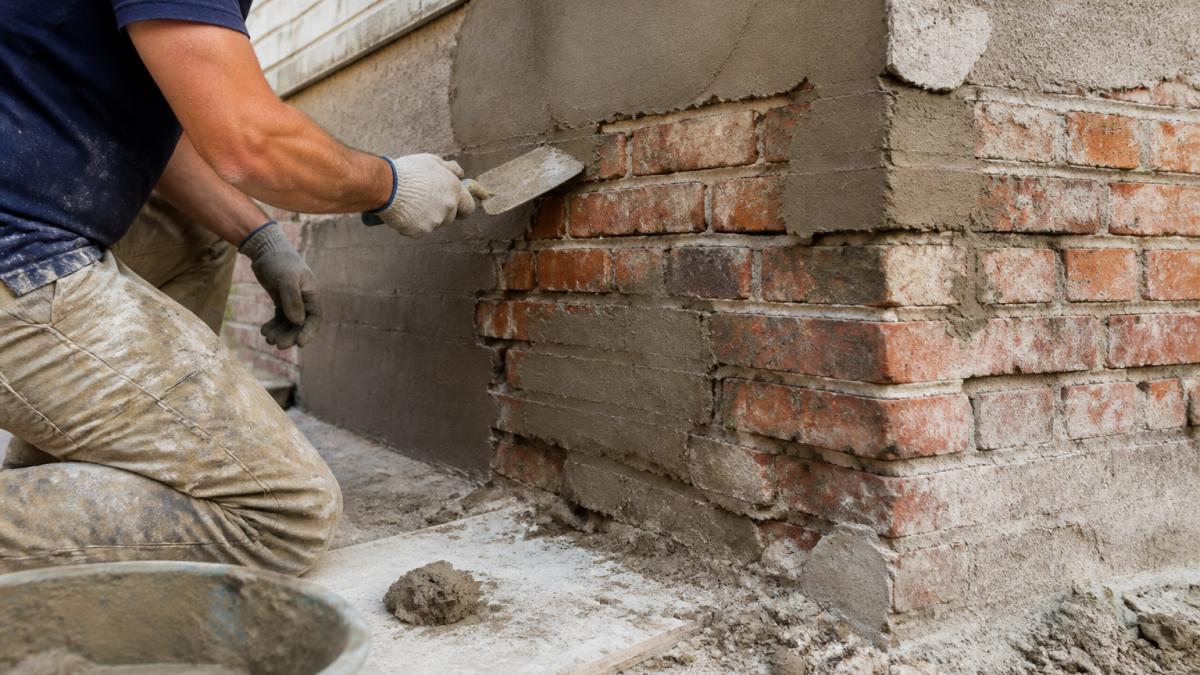
 how-to
Masonry Repair for Moisture Intrusion: A Step-by-Step Guide
Table of Contents
- Identifying Moisture Entry Points in Masonry
- Signs of Water Damage in Brick Walls
- Diagnostic Techniques for Leak Detection
- How to Seal Masonry Cracks Before Painting Exterior Walls
- Best Masonry Crack Filler for Exterior Applications
- Mortar Joint Repair and Repointing
- Advanced Moisture Control: Curtain Grouting and Injection Methods
- Material Compatibility and Seasonal Maintenance Checklist
- Frequently Asked Questions
Last Updated: October 2, 2026
Identifying Moisture Entry Points in Masonry
Masonry repair for moisture intrusion begins with understanding how water finds its way through brick, mortar, or stone. The damage starts small but spreads fast. Moisture problems can destroy structural integrity if left untreated.
Water enters masonry through several paths. Cracks in mortar joints are the most common entry point. Gaps around windows and doors let water seep in. Poor drainage around foundations channels water directly into walls. Capillary action pulls moisture up from soil into the foundation. Freeze-thaw cycles crack mortar and create new pathways for water.
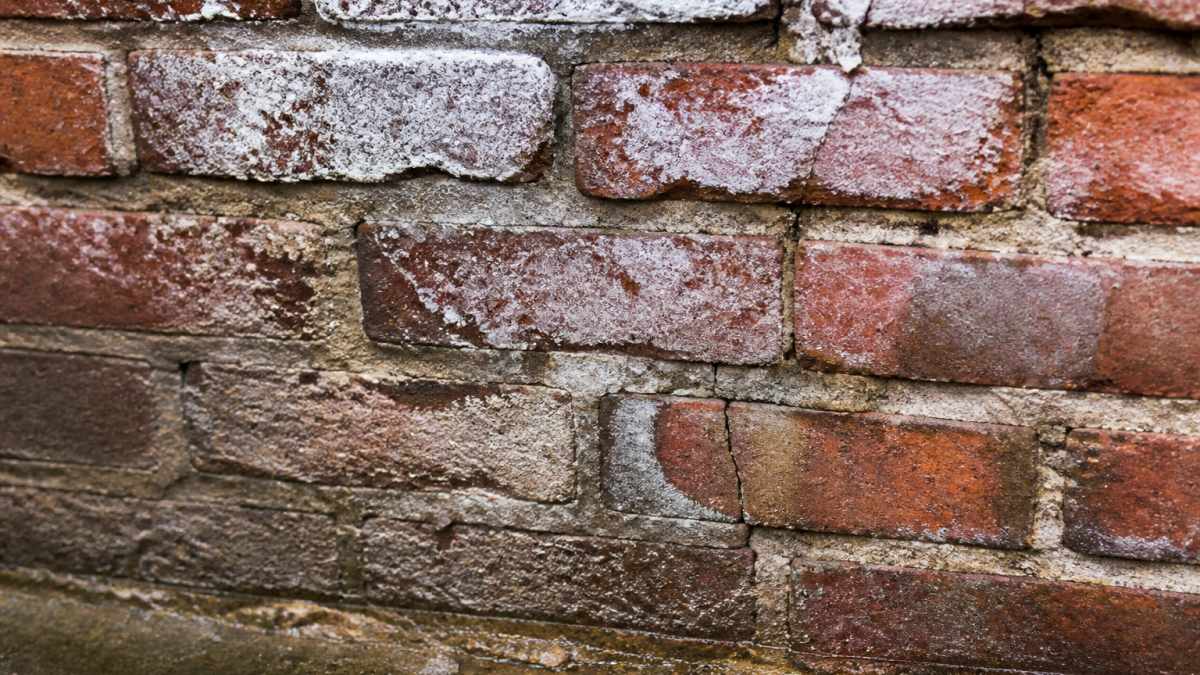
The key is finding where water enters before it causes serious damage. Look for these common problem areas:
- Cracks in mortar joints (horizontal and vertical)
- Gaps where flashing meets brick
- Missing or deteriorated caulk around windows
- Efflorescence (white powder deposits on brick)
- Spalling (brick surface peeling away)
- Weep holes that are blocked or missing
- Areas where gutters overflow or drain poorly
Professional evaluation can identify moisture pathways you might miss. But a careful visual inspection catches most problems early.
Signs of Water Damage in Brick Walls
Water damage in brick walls shows itself in predictable ways. Staining is usually the first sign. Dark patches appear on the interior or exterior surface. These stains spread over time if moisture continues entering.
Efflorescence appears as white, chalky deposits on brick surfaces. This happens when water carries salts through the masonry. The water evaporates, leaving the salts behind. While efflorescence itself isn't dangerous, it signals active moisture movement.
Spalling occurs when brick or mortar breaks away in chunks. Freeze-thaw cycles cause this damage. Water enters the masonry, freezes, expands, and cracks the material. Each freeze-thaw cycle causes more damage.
Interior signs include:
- Damp drywall or plaster
- Peeling paint on interior walls
- Mold or mildew growth
- Musty odors in the home
- Visible water stains on ceilings or walls
- Soft or spongy drywall
- Rust stains from metal lath or rebar
Bulging walls indicate serious structural problems. This means hydrostatic pressure is pushing against the masonry from outside. Professional repair is urgent in these cases.
Diagnostic Techniques for Leak Detection
Finding the exact source of moisture is half the battle. Visual inspection catches obvious problems. Moisture meters measure water content in materials. Thermal imaging shows temperature differences that reveal moisture pathways. Professional evaluation combines these techniques for accuracy.
Visual Inspection and Moisture Meters
Start with a careful visual inspection. Look for the signs listed above. Trace water stains upward to find where water enters. Stains often point directly to the problem area.
Moisture meters measure water content in brick, mortar, and drywall. Readings above 20% indicate active moisture problems. These handheld devices are affordable and easy to use. Meter readings help you track moisture levels over time.
Probe the mortar joints carefully. Soft, crumbling mortar absorbs water easily. Hard, intact mortar resists moisture better. Test multiple areas to understand the full scope of damage.
Look for water pathways. Moisture travels downward due to gravity. It also spreads horizontally along mortar joints. Trace the pattern to find the entry point.
Professional Evaluation vs. DIY Assessment
DIY inspection works for obvious problems. You can spot cracks, efflorescence, and staining yourself. A moisture meter gives you concrete data. But professional evaluation catches hidden issues.
Professionals use thermal imaging cameras. These show moisture patterns invisible to the naked eye. They identify moisture trapped inside walls before visible damage appears. This early detection prevents costly structural repairs.
Professional inspectors understand building envelope principles. They know how moisture moves through different materials. They recognize when problems require specialized repair methods. They can recommend the most cost-effective solution for your specific situation.
A common mistake is assuming surface cracks are the only problem. Water often enters through one location and travels to another before appearing as damage. Professionals trace these pathways accurately.
How to Seal Masonry Cracks Before Painting Exterior Walls
Sealing cracks is essential before painting. Paint won't stop water from entering masonry. But proper crack sealing prevents moisture from getting behind the paint. This extends the life of both the sealant and the paint.
Preparing the Surface
Clean the crack thoroughly first. Remove loose mortar, dirt, and debris with a wire brush. Vacuum out dust and small particles. The crack must be clean for sealant to bond properly.
For hairline cracks, use a cold chisel and hammer to widen the crack slightly. This creates a better surface for sealant to grip. Make the crack V-shaped, wider at the surface than at the depth. This shape helps sealant stay in place.
For larger cracks, remove all deteriorated mortar. The goal is to expose solid material on both sides of the crack. Use a grinder if needed to create clean edges.
Let the crack dry completely before applying sealant. Moisture prevents proper bonding. Wait at least 24 hours after cleaning.
Applying Sealant Correctly
Use a sealant designed for masonry. Polyurethane or silicone sealants work well for exterior cracks. Read the product label to confirm it's rated for masonry and outdoor use.
Fill the crack completely. Use a caulking gun for precise application. Start at the bottom of the crack and work upward. Apply steady pressure to force sealant into the crack.
Smooth the sealant with a wet tool immediately after application. Use a caulk smoother or a wet finger. This creates a better seal and improves appearance.
Allow the sealant to cure fully. Most products require 24-48 hours. Don't paint over the sealant until it's completely cured. Check the manufacturer's instructions for exact timing.
Best Masonry Crack Filler for Exterior Applications
Choosing the right crack filler makes a huge difference. Different products work best for different crack types and conditions.
For small hairline cracks, use caulk-based fillers. These flex with masonry movement and resist cracking. Polyurethane caulks are durable and weather-resistant. Silicone caulks last longer but are harder to paint over.
For larger cracks, use concrete patching compounds. These are thicker than caulk and fill bigger gaps. They bond well to masonry and handle movement better. Look for products labeled "flexible" or "elastomeric" for best results.
Injection grouting works for deep cracks that extend into the masonry. High-strength grout fills voids behind the surface crack. This prevents water from traveling through the crack into the building. Professional equipment is needed for proper injection.
Lime-based mortars work well for historic masonry. They're more breathable than Portland cement mortars.
The best choice depends on:
- Crack size and depth
- Masonry material type
- Climate and freeze-thaw cycles
- Whether the surface will be painted
- Budget and repair timeline
Mortar Joint Repair and Repointing
Deteriorated mortar joints are the biggest source of moisture intrusion. Repointing replaces old, damaged mortar with new material. This is one of the most effective moisture control methods.
Advanced Moisture Control: Curtain Grouting and Injection Methods
When standard repairs aren't enough, advanced techniques provide additional protection. Curtain grouting and permeation grouting create moisture barriers inside masonry.
These methods work best for:
- Historic masonry that can't be repointed
- Walls with extensive interior cracking
- Situations where surface repairs have failed
- Preventing bulk water from entering the building
Material Compatibility and Seasonal Maintenance Checklist
Material compatibility matters enormously. Incompatible materials cause accelerated deterioration. Understanding your masonry type guides repair decisions.
Seasonal maintenance prevents moisture problems from developing:
- Spring: Inspect for winter damage. Look for cracks from freeze-thaw cycles. Clean gutters and check drainage.
- Summer: Seal any new cracks found in spring. Paint exterior surfaces if needed. Ensure proper grading away from foundation.
- Fall: Prepare for winter. Seal cracks before freezing weather. Check and repair flashing before heavy rains.
- Winter: Monitor for water stains and moisture signs. Avoid salt-based ice melt near masonry.
| Task | Timing | Frequency | Impact |
|---|---|---|---|
| Visual inspection | Spring and fall | Twice yearly | Catches problems early |
| Mortar joint assessment | Every 5-10 years | As needed | Prevents major water entry |
| Gutter cleaning | Spring and fall | Twice yearly | Prevents water overflow |
| Drainage check | After heavy rain | As needed | Stops water pooling |
| Crack sealing | Spring and fall | Annually | Blocks moisture pathways |
| Repointing | Every 25-30 years | As needed | Restores water resistance |
:::pro-tip Don't wait for visible damage to take action. Moisture damage accelerates once it starts. Regular seasonal maintenance catches problems when they're small and inexpensive to fix.
Frequently Asked Questions
What are the most common signs of moisture intrusion in brick?
Common indicators include efflorescence (white powdery deposits), spalling (surface flaking), dark stains, mortar deterioration, and visible cracks in masonry. Interior signs include peeling paint, mold growth, and water rings on walls. These symptoms suggest moisture is penetrating the building envelope through capillary action or bulk water entry. Early detection prevents structural damage and costly repairs.
How do you seal masonry cracks before painting exterior walls?
First, clean the crack thoroughly with a wire brush and remove debris. For hairline cracks, use a flexible masonry sealant; for wider cracks (over 1/4 inch), apply a masonry crack filler or caulk first. Fill to slightly above the surface, then smooth with a putty knife. Allow proper curing time before painting. Choose breathable sealants that allow vapor permeability to prevent moisture trapping.
Can moisture intrusion cause structural damage to masonry?
Yes. Repeated freeze-thaw cycles combined with moisture cause significant structural deterioration. Water penetration weakens mortar joints, promotes spalling, and can damage the masonry substrate itself. Over time, hydrostatic pressure from accumulated moisture can compromise the building envelope and structural integrity. Professional evaluation is recommended if you suspect deep moisture penetration affecting load-bearing walls.
What is the best sealant for masonry moisture protection?
Siloxane-based water repellents and breathable masonry sealants are effective for moisture protection while allowing vapor transmission. Avoid non-breathable coatings, which trap moisture and cause accelerated decay. For joint repair, lime-based mortar is often preferable to Portland cement as it's more flexible and vapor-permeable. Material compatibility with existing masonry is critical, test any sealant on a small area first.