 how-to
How to Prevent Roof Leaks From Recurring
Table of Contents
- Why Roof Leaks Come Back: Common Causes of Roof Leaks
- How to Find the Source of a Roof Leak Accurately
- Step-by-Step Repair Process to Stop Leaks Permanently
- Roof Leak Prevention Tips for Long-Term Protection
- Roof Maintenance Checklist to Catch Problems Early
- How to Verify a Roof Repair Was Done Correctly
- When to Call a Professional vs. DIY Inspection Limits
- Conclusion
- Frequently Asked Questions
Last Updated: October 5, 2026
Why Roof Leaks Come Back: Common Causes of Roof Leaks
Roof leaks that return after repair are frustrating and costly, but understanding how to prevent roof leaks recurring can save you thousands in water damage. Most recurring leaks stem from incomplete repairs or missed secondary damage, not new damage.
Incomplete Repairs and Missed Secondary Damage
The most common reason a roof leak recurs is incomplete repair. A contractor seals the obvious leak but misses secondary damage caused as water traveled through the roof system. Water follows the path of least resistance, so by the time you see a leak inside, it has soaked multiple roof sections.
Common missed damage includes:
- Saturated underlayment that needs replacement
- Rotted roof deck sections that weaken fasteners
- Moisture trapped in attic insulation
- Compromised waterproof barriers under shingles
Flashing and Seal Failures
Flashing is metal trim that directs water away from roof penetrations (holes where pipes, vents, and chimneys break through). Flashing failures are the leading cause of recurring roof leaks. Sealant degrades from sun, temperature changes, and weathering; once cracked, water seeps behind the flashing. Many contractors apply new sealant without replacing damaged flashing, so it fails just as fast.
Improper Underlayment Installation
Underlayment is the waterproof barrier under shingles and your roof's second line of defense. Poor installation is a hidden cause of recurring leaks: incorrect overlaps let water seep sideways into the deck, fasteners create unsealed holes, and wrinkles create water channels. Replacing shingles alone won't stop a leak caused by failed underlayment.
How to Find the Source of a Roof Leak Accurately
Finding where a leak originates is harder than most homeowners expect. Water enters at one point but travels to another before dripping inside, so tracing the entry point requires systematic inspection.
Trace Water Paths From Inside the Attic
Start in the attic, where water's path becomes visible before it causes interior damage. Look for water stains on the underside of the roof deck and follow them upslope, water flows downhill, so the stain pattern points toward the entry point. Check the underlayment for wet spots and insulation for saturation, tracing upward to find where water entered.
What to look for in the attic:
- Dark stains on roof deck or underlayment
- Wet or damp insulation
- Mold or mildew growth (indicates prolonged moisture)
- Water droplets during or after rain
- Rust stains from fasteners (shows water penetration)
Inspect Roof Penetrations and Flashing Carefully
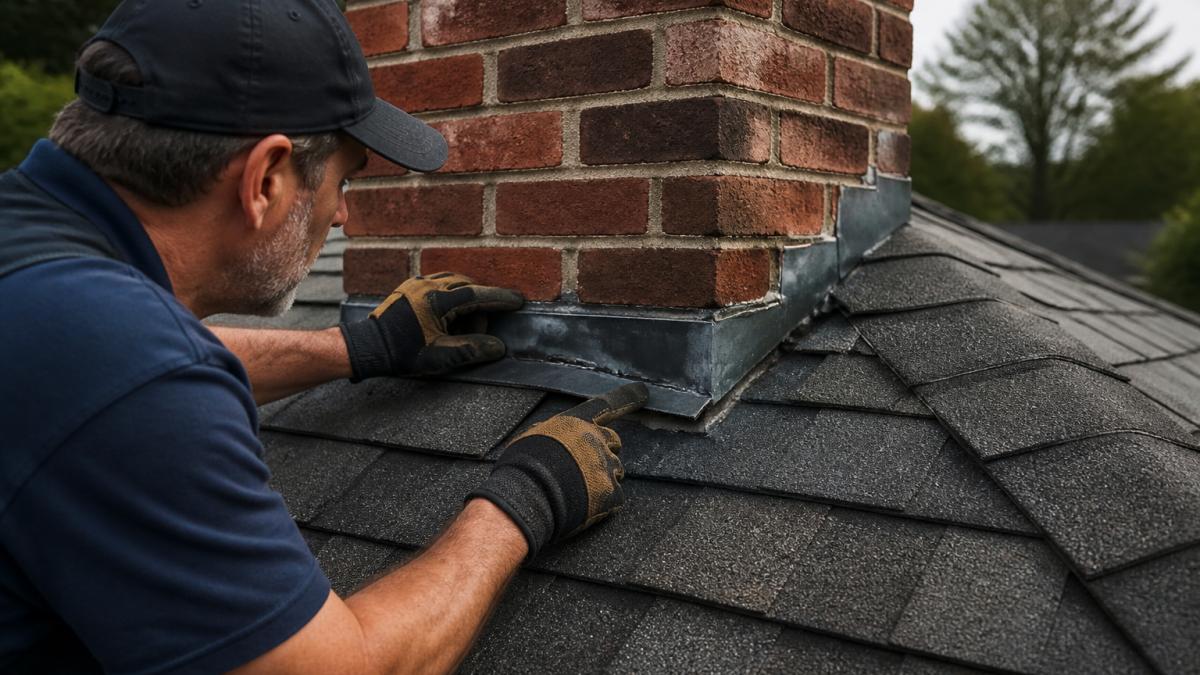
Roof penetrations, chimneys, vents, skylights, and any pipe or antenna breaking through the roof, are the most common leak sources. Inspect the flashing around each for cracks, gaps, or separation, and check sealant for cracking or missing sections. Photograph each penetration, noting damage, rust, or deterioration; wind-facing sides often show more wear.
Document the Leak Location and Weather Patterns
Record when leaks occur and what weather preceded them: date and time, rain intensity, wind direction, temperature, interior water location, whether leaks appear during all rains or only heavy storms, and any seasonal pattern. A leak that only appears during northeast wind-driven rain points to northeast exposure; one during all rains suggests a more serious breach.
Step-by-Step Repair Process to Stop Leaks Permanently
A proper roof leak repair follows a logical sequence, and skipping steps is why repairs fail, understanding how to prevent roof leaks recurring requires completing every step.
Step 1: Clear Debris and Inspect the Damaged Area
Before any repair, clear leaves, dirt, and debris from the roof surface and gutters, clean gutters prevent water backup that forces water under shingles. Inspect the damaged area for soft deck spots (rot), loose or missing fasteners, and shingle damage, which often extends beyond the obvious leak point. Rotted deck sections must be replaced, since fasteners won't hold in compromised wood.
Step 2: Replace or Repair Shingles and Roof Deck Damage
Begin repairs from the roof deck up. Replace rotted deck sections by removing shingles above the damage, cutting out bad wood, and installing new pressure-treated plywood or OSB secured with fasteners spaced 6 inches apart. Replace damaged shingles by lifting old ones, sliding new ones into place, fastening with roofing nails or screws, and sealing fasteners with roofing cement.
Step 3: Seal Roof Penetrations and Apply Waterproof Barriers
After shingles and deck are repaired, address penetrations and waterproofing. Replace or reseal flashing around chimneys, vents, and skylights, using pre-manufactured flashing with upper pieces overlapping lower ones so water flows over, not under. Apply climate-rated sealant under flashing edges (freeze-thaw cycles require flexible sealants) without over-sealing, which can trap moisture.
Step 4: Verify the Repair With Water Testing
After repairs, test before declaring the job finished, this is the step most contractors skip, and why leaks recur. Have the contractor run water slowly over the repaired area (mimicking rain, not a downpour) while someone watches from the attic. If water appears, the repair is incomplete and needs adjustment before the contractor leaves.
Roof Leak Prevention Tips for Long-Term Protection
Preventing leaks is cheaper and easier than repairing them. A maintenance routine catches small problems before they become big ones.
Maintain Gutters and Drainage Systems
Gutters are your roof's first defense against water damage; clogged gutters force water to back up under shingles, causing leaks even when the roof is sound. Clean gutters twice a year (spring and fall), removing leaves, dirt, and debris, and check for sagging that prevents flow toward downspouts. Ensure downspouts extend at least 4-6 feet from the house so water doesn't pool near the foundation.
Address Ventilation and Moisture Buildup in the Attic
Attic ventilation prevents moisture buildup that weakens roofing materials; without it, warm, moist air condenses on the underside of the roof deck, promoting mold and rot. Most building codes require 1 square foot of ventilation per 150 square feet of attic space (or 1 per 300 with a vapor barrier), balanced between intake (soffit) and exhaust (ridge or gable) vents.
Apply Roof Coatings and Sealants by Material Type
Roof coatings add a waterproof layer over existing roofing and work best on flat or low-slope roofs where water pools. Choose by material: acrylic or silicone for asphalt shingles (avoid oil-based products that soften asphalt); epoxy or polyurethane for metal; penetrating sealers for tile (avoid thick coatings that trap moisture); and TPO-compatible sealants for TPO roofing.
Roof Maintenance Checklist to Catch Problems Early
A structured maintenance routine catches damage before it causes leaks.
Seasonal Inspection Schedule and What to Look For
Fall (before winter): Clear gutters and downspouts, trim overhanging branches, inspect for summer storm damage, check attic insulation and ventilation, and seal gaps or cracks.
Winter (after major storms): Check for ice dams, snow accumulation in valleys, and leaks after heavy snow; document damage for spring repairs.
Signs of Damage That Need Immediate Attention
Some roof problems require urgent repair:
Visible damage: large holes or tears, missing or hanging shingles, flashing separated from the roof, rot or soft deck spots, sagging that indicates structural damage.
Interior signs: water stains on ceilings or walls, wet attic insulation, mold or mildew, water dripping into the attic during rain.
After storms: wind or hail damage, blown-off shingles, displaced flashing, debris embedded in the roof.
Address these immediately, delaying allows secondary water damage that makes repairs more expensive.
How to Verify a Roof Repair Was Done Correctly
After a contractor completes roof leak repairs, verify the work before paying the final bill, poor workmanship now means recurring leaks later.
Inspect Seals, Fasteners, and Flashing Alignment
Walk the roof (safely, or use binoculars from the ground) and inspect the repair area. Fasteners should be evenly spaced (typically 6 inches apart) and driven straight, bent or crooked ones don't seal. Sealant should form a continuous bead around fasteners and flashing edges; gaps are leak points. Flashing should overlap shingles properly, with upper pieces over lower ones so water flows over seams.
Document the Work and Get Written Warranty Details
Request documentation of all work: materials used, areas repaired or replaced, inspection and water test results, and written warranty details. A quality contractor stands behind their work, so get a written warranty specifying what's covered (labor, materials, or both), duration (typically 1-5 years for repairs), what voids it (improper maintenance, further weather damage), and how to file a claim.
When to Call a Professional vs. DIY Inspection Limits
Roof leak diagnosis and repair involve real risks, so know your limits.
You can safely do: interior attic inspection, ground-level inspection with binoculars, gutter cleaning, and documenting leak patterns and damage.
Roof work involves fall risk, a slip causes serious injury, and professional roofers have insurance, safety equipment, and training.
SunPro Contracting LLC offers free roof inspections.
Conclusion
Recurring roof leaks are frustrating but preventable. Most result from incomplete repairs, missed secondary damage, or flashing failures.
SunPro Contracting LLC specializes in roof leak diagnosis and repair. With over 100 years of combined experience, we use material-specific methods for asphalt shingles, tile, or TPO.
Frequently Asked Questions
Why does the same spot keep leaking after a roof repair?
Most recurring leaks stem from incomplete repairs that miss secondary damage, improper flashing installation, or inadequate waterproof barriers. Water often travels sideways under shingles before dripping into your attic, so the visible leak spot may not be the actual source. A contractor who repairs only the obvious hole without sealing penetrations, replacing damaged underlayment, or checking flashing alignment will leave the root cause untouched. Proper diagnosis requires tracing water paths from inside the attic and inspecting all roof penetrations, not just the spot where water appears.
How can I tell whether a roof leak has been properly repaired?
A proper repair includes new or sealed flashing, replaced or reinforced shingles, intact waterproof barriers, and sealed fasteners and penetrations. After repair, ask your contractor to show you the replaced materials and document the work in writing. Test the repair by running water from a hose onto the repaired area while someone watches from the attic for drips. Request a detailed warranty that covers recurrence within a set period. If a leak returns within months, your contractor should return at no charge to identify what was missed.
How often should I inspect my roof to prevent leaks?
Inspect your roof at least twice a year: once in spring after winter weather and once in fall before heavy rain and storm season. After storms or high winds, check immediately for visible damage. During inspections, look for missing or curled shingles, deteriorated flashing, clogged gutters, and debris accumulation. Document any issues with photos and dates. This preventive approach catches small problems before they develop into leaks and provides evidence if you need to file an insurance claim for storm damage.
What's the difference between roof repair and replacement for recurring leaks?
Repair works when damage is localized and the roof structure is sound. If leaks recur across multiple spots, the roof deck is soft or rotted, or the roof is over 20 years old, replacement is more cost-effective than repeated repairs. Replacement includes new shingles, underlayment, flashing, and deck repair, eliminating the risk of missed damage. Repair preserves budget for isolated problems; replacement provides a fresh start with warranty protection and eliminates the frustration of leaks returning season after season.
National Roofing Contractors Association maintenance guidelines
OSHA roof safety standards and fall protection requirements
American Society of Home Inspectors roof inspection standards