 how-to
Gutter Installation for Heavy Rain: 7 Steps That Hold
Table of Contents
- Step 1: Measure the Roof and Plan Gutter Layout
- Step 2: Pick the Right Gutter Profile and Material
- Step 3: Gutter Pitch Calculation That Moves Water Fast
- Step 4: Oversized Gutter Downspouts for Storm-Level Flow
- Step 5: Hangers, Brackets, and Fastening for Wind and Weight
- Step 6: Sealing Joints, End Caps, and Hidden Leaks
- Step 7: Why Do Gutter Guards Prevent Foundation Water Damage?
- When to Call a Professional for Gutter Installation
- Frequently Asked Questions
Last Updated: September 14, 2026
Step 1: Measure the Roof and Plan Gutter Layout
Gutter installation for heavy rain starts with math, not a ladder. Most overflow complaints trace back to a system undersized from day one, not a clog. Before buying a hanger, measure the roof footprint, note the pitch, and count downspout locations.
Total roof area = footprint length × width, plus a pitch adjustment. A steep roof sheds water faster than a low-slope one, so it needs more capacity for the same square footage.
Roof pitch changes how fast water arrives at the gutter. A 6:12 pitch delivers runoff roughly twice as fast as a 3:12.
Run length determines how many downspouts you need; long runs collect more water before it can exit.
The Rainfall-Intensity Math Most Guides Skip
Almost every installation guide leaves this out: gutter size depends not on roof area alone, but on roof area multiplied by your region's rainfall intensity. The same 2,000-square-foot roof needs a bigger system on the Gulf Coast than in the high desert.
The industry sizing method comes from the sheet-metal trade:
Gutter capacity (gallons per minute) must exceed roof area × rainfall intensity.
Rainfall intensity is expressed in inches per hour, and design storms are described by how often they're equaled or exceeded, a 10-year, 25-year, or 100-year storm. Most practitioners size to a short-duration, high-intensity event, because that's what overwhelms a system.
A workable planning approach:
- Find your local design rainfall intensity. Your building department, a licensed engineer, or National Weather Service data will give you a defensible number; many jurisdictions publish a plumbing or storm-drainage figure.
- Convert roof area to effective catchment. For a pitched roof, the horizontal footprint is the catchment area, not the sloped surface. A 40 × 50 footprint is 2,000 square feet of catchment regardless of pitch.
- Multiply catchment by intensity. This gives a peak flow rate in cubic feet per second or gallons per minute, per your reference table's units.
- Match that flow to a gutter-and-downspout combination rated for it. Manufacturer capacity tables are published per profile, per width, and per downspout size, use them instead of guessing.
Why the Pitch Adjustment Matters
A steep roof doesn't create more water, but it delivers it faster. That's why two homes with identical footprints can need different gutter sizes if one has a 3:12 pitch and the other a 10:12, the steeper roof concentrates the same storm into a shorter, sharper pulse.
A common pattern: a homeowner upgrades from 5-inch to 6-inch K-style and the overflow stops, not because the roof got bigger, but because the original installer sized on square footage alone.
A Planning Table That Accounts for Intensity
Use this as a starting framework, then confirm against manufacturer capacity tables for your profile. The columns represent increasing design rainfall intensity, the short-duration bursts heavy-rain climates produce.
| Roof Catchment | Moderate Intensity | High Intensity | Extreme Intensity |
|---|---|---|---|
| Up to 1,200 sq ft | 5-inch K-style, 2 downspouts | 5-inch K-style, 2 downspouts | 6-inch K-style, 2 downspouts |
| 1,200-2,400 sq ft | 5-inch K-style, 3 downspouts | 6-inch K-style, 3 downspouts | 6-inch K-style, 4 downspouts |
| 2,400-3,600 sq ft | 6-inch K-style, 4 downspouts | 6-inch K-style, 4 downspouts | 7-inch or half-round, 4+ downspouts |
| Over 3,600 sq ft | 6-inch K-style, 4+ downspouts | 7-inch or half-round, 4+ downspouts | 7-inch or half-round, 6+ downspouts |
Sizing Gutters to Your Roof's Water Volume
Gutter sizing matches gutter width and downspout count to the volume of water your roof sheds at peak rainfall. A 5-inch K-style handles far less volume than a 6-inch, and the difference compounds fast in a downpour. When in doubt, go one size up.
Step 2: Pick the Right Gutter Profile and Material
Material choice comes down to three options. Aluminum coil is the standard: light, rust-resistant, and easy to form into seamless runs on site. Vinyl is the budget pick but sags in heat and cracks in cold. Copper lasts decades and looks excellent, but costs several times more and needs proper fastening because it's heavier.
Profile matters as much as material. K-style gutters carry more water per inch of width than half-round because of their flat back and shaped front. Half-round drains well but holds less volume for the same footprint.
Step 3: Gutter Pitch Calculation That Moves Water Fast
Gutter pitch is the downward slope of the run toward the downspout, and it's the most misunderstood part of gutter installation. Too flat and water pools; too steep and the gutter pulls away from the fascia.
The standard target is 1/4 inch of drop per 10 feet of run (hud.gov). For heavy-rain regions, some installers push toward 1/2 inch per 10 feet to keep water moving during intense rainfall.
Here's the calculation:
- Measure your longest run in feet
- Divide by 10
- Multiply by 0.25 (or 0.5 for steep pitch)
A 40-foot run at 1/4 inch per 10 feet needs 1 inch of total drop from the high end to the downspout. Mark that drop on the fascia board before you hang anything.
Why this matters: water that sits in a flat gutter finds every seam, fastener hole, and weak joint. Correct slope is cheap insurance.
Step 4: Oversized Gutter Downspouts for Storm-Level Flow
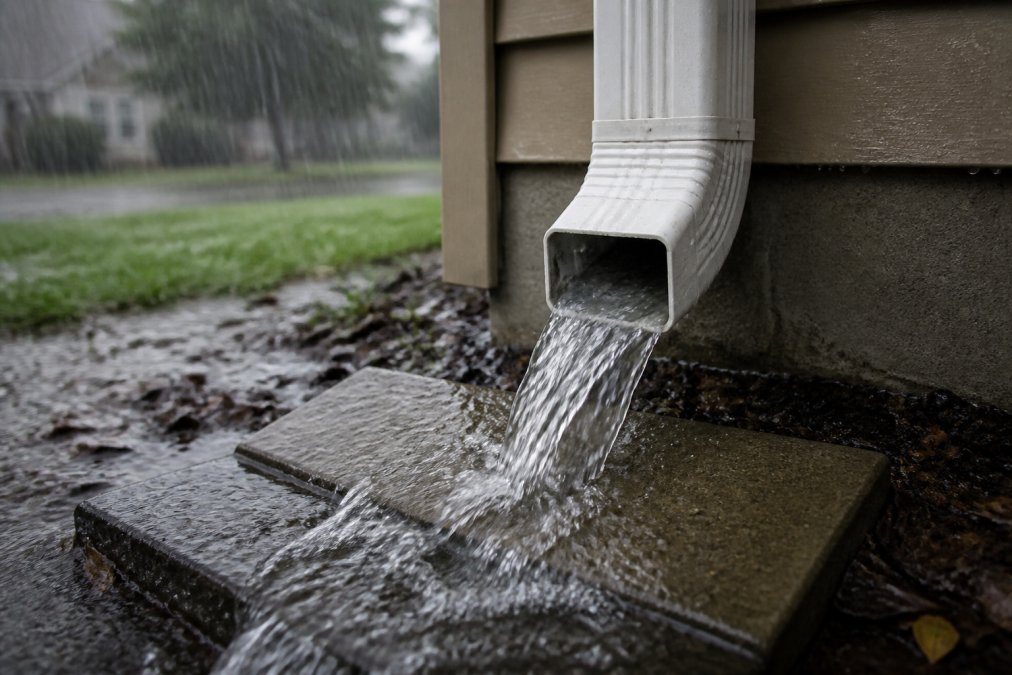
Oversized gutter downspouts are the fix when standard 2x3-inch outlets can't keep up. Upgrading to 3x4-inch rectangular downspouts roughly doubles the flow rate, often the difference between a system that drains and one that overflows at the corners.
The Hydraulics: Why Area Beats Length
Downspout capacity is governed by cross-sectional area, not length. Two 2x3 downspouts move less water than one 3x4. If gutters overflow at the corners but the run stays clear, the bottleneck is almost always the downspout.
A 2x3 rectangular downspout has a nominal cross-section of about 6 square inches; a 3x4 has about 12 (SMACNA Downspout & Gutter Calulator). But the relationship isn't perfectly linear, because a downspout is a vertical pipe with friction losses along its walls and at every elbow. A 3x4 with four elbows can underperform a 2x3 with one.
That's why the practical rule is: increase size before you increase elbow count. A single 3x4 with a clean, straight drop will out-drain two 2x3s that zigzag around a soffit.
Diagnosing an Overflow Before You Buy Anything
Before spending money on bigger downspouts, run this diagnostic. It separates a capacity problem from a clog problem, and the fixes differ completely.
- Overflow at the corners or along the run, but the downspout outlet is flowing hard. The gutter is undersized or the pitch is wrong. Bigger downspouts won't help.
- Overflow everywhere, and the downspout outlet is a trickle. The downspout is clogged or undersized. This is where upsizing pays off.
- Overflow only at one end, and the downspout on that end is dry. The pitch is reversed or flat on that section. Water is pooling and never reaching the outlet.
- Overflow only during the heaviest few minutes of a storm. This is a peak-flow problem, not a steady-state one. It points to undersized downspouts or too few for the catchment.
- Overflow at the gutter, water sheeting down the fascia. The gutter has pulled away, a fastening failure, not a capacity failure.
High-Flow Downspout Options
Beyond going bigger, a few configurations move storm-level volume more effectively:
- 3x4-inch rectangular downspouts are the standard upgrade from 2x3. They fit most residential profiles and roughly double the cross-section.
- Round downspouts in 3-inch and 4-inch diameters flow well and resist clogging better than rectangular because there are no internal corners for debris. They need adapters at the gutter outlet.
- Rain chains are decorative, not high-flow. They handle light-to-moderate flow; in a genuine downpour they overflow and soak the wall. Use them where volume is modest and aesthetics matter.
- Oversized outlets, widening the hole where the downspout connects, can matter as much as the downspout itself. A 3x4 downspout fed by a 2x3 outlet is still a 2x3 system.
Placement Rules That Hold Up in Storms
- Space downspouts no more than 35-40 feet apart on long runs (nahb.org).
- Terminate every downspout at a splash block or buried drainage system, never directly against the foundation.
- Add a high-flow downspout at the lowest point of any run over 40 feet.
- Keep the drop as vertical as possible. Every elbow costs capacity.
- Size the outlet to match the downspout, not the other way around.
Step 5: Hangers, Brackets, and Fastening for Wind and Weight
Fastening is where cheap installations fail. A full gutter in a storm weighs far more than an empty one, and wind loading on a long run is significant.
Hidden hangers screwed into the fascia outperform old-style gutter spikes. Spikes loosen over time, pull out under load, and leave oversized holes that rot the fascia. Hidden hangers use a screw-driven bracket that holds the gutter's front lip and back wall.
For heavy-rain and high-wind areas:
- Space hangers every 24 inches, not 36
- Use hangers rated for the gutter profile you installed
- Add extra hangers within 12 inches of every downspout outlet
- Screw into solid wood, not fascia wrap or trim board
Step 6: Sealing Joints, End Caps, and Hidden Leaks
Sealant is a backup, not a primary defense. Well-formed seamless gutters with crimped and riveted connections need very little. Where you do seal, use an exterior-rated gutter sealant on clean, dry metal.
The joints that leak most often:
- End caps, where the gutter terminates
- Inside and outside corners on sectional systems
- Downspout outlets and their fasteners
- Anywhere a hanger screw pierces the gutter back wall
Dry-fit before you seal. Cut your sections, snap or rivet them together, and check the pitch with a level before any sealant goes on. Once sealant cures, moving a joint means cutting it apart.
For expansion, leave a small gap at every joint on long runs. Metal expands and contracts with temperature, and a tight joint under tension will crack its sealant within a season.
Step 7: Why Do Gutter Guards Prevent Foundation Water Damage?
Gutter guards prevent foundation water damage by keeping debris out so water flows to the downspouts instead of overflowing at the fascia. When a gutter clogs, water sheets down the wall, pools at the foundation, and finds its way into basements, crawlspaces, and slab edges.
Debris accumulation is the leading cause of overflow in mature neighborhoods with tree cover. A single storm can fill a gutter with enough leaf litter to block the entire run. Once blocked, even a correctly sized system overflows.
Gutter guards don't eliminate maintenance, but they cut it dramatically. You'll still check the system once or twice a year, but you won't be pulling leaves after every storm. For homes surrounded by pines or oaks, guards are the difference between a functioning drainage system and a seasonal chore.
Pair guards with proper water diversion at the downspout: a splash block, a buried drain line, or a dry well. Moving water away from the foundation is the whole point.
When to Call a Professional for Gutter Installation
Some jobs are genuinely DIY-friendly. A single-story ranch with a short run and easy ladder access is a weekend project for a careful homeowner: the math is simple, the material is available, and mistakes are fixable.
The jobs that go wrong are the ones with height, complexity, or storm history.
Call a professional when:
- Your roof is two stories or steeper than 8:12
- You've had repeated overflow or foundation water issues
- The fascia board is soft, rotted, or wrapped
- You need seamless runs longer than a homeowner can form on site
- Your system has failed more than once in the same spot
SunPro Contracting LLC brings over 100 years of combined experience to gutter and roofing work across residential and commercial properties. We handle the sizing math, fastening, and drainage details that keep water away from your foundation. If your gutters failed in the last storm, get an itemized assessment before the next one.
Gutter installation for heavy rain isn't about buying the biggest system on the shelf. It's about matching gutter size, pitch, downspout capacity, and fastening to the water volume your roof actually produces. Get those four right and the system holds; get them wrong and you'll be back on the ladder after every storm.
If you'd rather not gamble on the math, SunPro Contracting LLC can size, install, and seal a gutter system built for storm-level flow. We offer full-service residential and commercial gutter work, seamless installation, and drainage solutions tailored to your property. Contact us today for a quote and protect your foundation before the next downpour.
Frequently Asked Questions
What type of gutters are best for heavy rain?
For heavy rain, seamless aluminum K-style gutters in a 6-inch profile outperform standard 5-inch gutters because they carry more water per foot. Aluminum resists rust and handles the weight of storm runoff without sagging. If your roof area is large or your region sees frequent downpours, pair 6-inch gutters with 3x4-inch downspouts to move water away fast.
How do I calculate the gutter size needed for heavy rainfall?
Start with your roof's square footage and pitch, then factor in your area's maximum rainfall intensity. A roof with a 6:12 pitch and 2,000 square feet of surface needs a gutter that handles roughly 1,200 gallons per hour during a 4-inch-per-hour storm. A gutter pitch calculation and downspout capacity check should follow sizing, so water never backs up at the outlet.
Can gutters be installed while it's raining?
No. Sealant and caulk need dry surfaces to bond properly. Installing during rain also creates safety risks on ladders and roofs. Schedule gutter installation for a dry day with at least a few hours of clear weather so joints, end caps, and hangers can set correctly.
How hard is it to put up rain gutters?
A single-story straight run is a manageable DIY project if you have a helper, a ladder, and the right tools. Two-story homes, rooflines with valleys or multiple corners, and seamless gutter fabrication call for a professional. Improper pitch, weak hangers, or poorly sealed miter joints cause overflow and fascia rot within a season or two.